Invoices for Salesforce functions in the exact same way in all the supported editions of Salesforce with the exception that Professional Edition users need to mantain the customization of the Invoice and Invoice Line Item objects manually.
The manual customization of the Invoice and Invoice Line Item objects is required every time that:
So basically the manual costumization of the Invoice and Invoice Line Item objects is only necessary during the setup stage when you create your invoice templates and billing scenarios. This is a one off activity unless you need to make changes.
Although you need to customize the Invoice and Invoice Line Item objects manually, you do not need to be concerned about when this customization is required. The application keeps track of your new invoice templates and billing rules, or changes in them, and signals you when it is necessary to customize the Invoice and Invoice Line Item objects. This is best described with an example. Consider the first time you setup the application. The steps you would follow would be:
At this point the application is setup and you are ready to process your sales' invoices. It is at this point, right after you created your invoice templates and billing scenarios, that the application signals you that you need to customize the Invoice and Invoice Line Item objects. The way this happens is message screen pops up in the following two events:
An example of the message screen that signals you the need to customize the Invoice and Invoice Line Item objects is shown below.
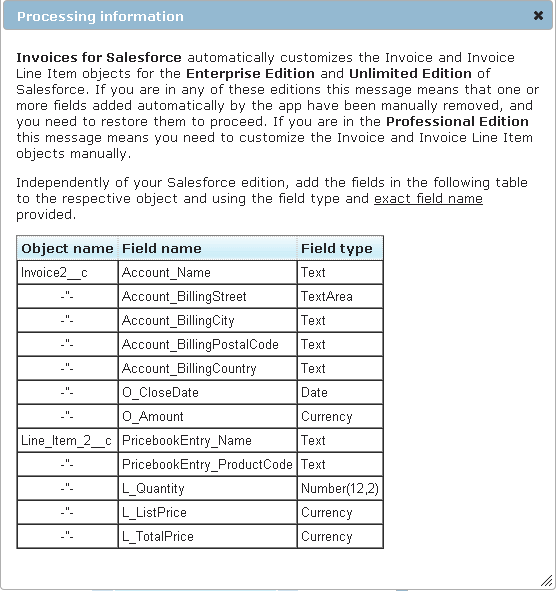
At this point you need to customize the Invoice and Invoice Line Item objects according to the information in the message screen table before proceeding. In order to customize the Invoice object follow these steps:
To customize the Invoice Line Item object follow the same steps as with the Invoice object above, except that you use the message screen table entries with Object name equals Line_Item_2__c